


In recent years Google has continued to push a greater emphasis on Structured Data (Schema) and as a result continues to support an ever-growing range of markups for various parts of a website. Essentially, schema is a way for you to highlight important information for your business, whether this is your address, business type or specific elements of a page, for example reviews, a recipe or price.
A Quick Overview
Google supports three main types of structured data markup – JSON-LD (recommended), Microdata and RDFa. Most people tend to use JSON-LD which is recommended by Google. This uses JavaScript code which is placed into the page head or body and does not necessarily need to be shown on the page to a user.
Most Popular Types of Schema
There is a huge variety of schema which you can implement on your website, depending on what type of website you have. We have rounded up some of the most popular schema types below:
Organization / Local Business – The Organization / Local Business schema markups are probably one of the most popular markups. This allows you to highlight to Google you key business details such as business name, address, logo, geo-location, Google maps listings & social media profiles.
Product Schema – Product schema is essential for e-commerce websites wanting to get star ratings, stock availability and price to show up in the search results like shown in the screenshot below.

Notice how ASDA is taking full advantage of product schema. Their listing stands out a lot more than the others with a great review rating, a price and an indication of whether the item is in stock or not. Most websites built on platforms such as WordPress or Magento can take advantage of product schema plugins which sort everything out for you without the need to go in and manually figure out all the coding.
There are a few other popular types of schema such as recipes, how-to, events and so on, but we’ll save them for another blog post and get back on topic. For today’s example, we’re going to use the local business schema markup for an optician and implement the schema through Google Tag Manager.
How to Implement Schema through Google Tag Manager
After trying to follow numerous guides on how to implement schema through Google Tag Manager and having no luck I decided to write my own guide. Many guides missed out one vital instruction which ultimately allowed the tag to fire but would not pull through the data to the testing tool. After digging around online I finally found the missing piece to the puzzle, so this guide should work perfectly!
- Find a schema generator
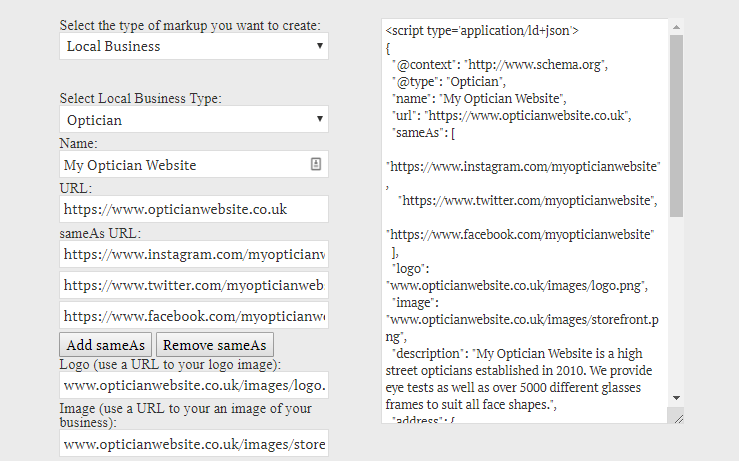
Your first step is to generate your schema. For this example, we used the J.D Flynn JSON-LD generator. What’s great about these generators is that you need no coding experience at all, you just input your data and the code is generated by the site.
- Input business details
Now you’ve found your schema generator you need to populate the schema with your info. First, choose what type of schema you would like, for this, we chose ‘Local Business’ > ‘Optician’. Once you’ve selected what type of business you are then you can begin inputting your business details. Your address, phone number and business name should exactly match your website and Google My Business profile. Simply fill in the left-hand column and your schema will start populating on the right-hand side. Your ‘sameAs URL’ can be your social media profiles or review platform.
- Include Google Map Details
You should include your coordinates which can be found within the URL of your Google maps listing and you can also share the link to your Google maps listing too. When selecting contact type, you can input ‘Customer Service’ to ensure it validates.
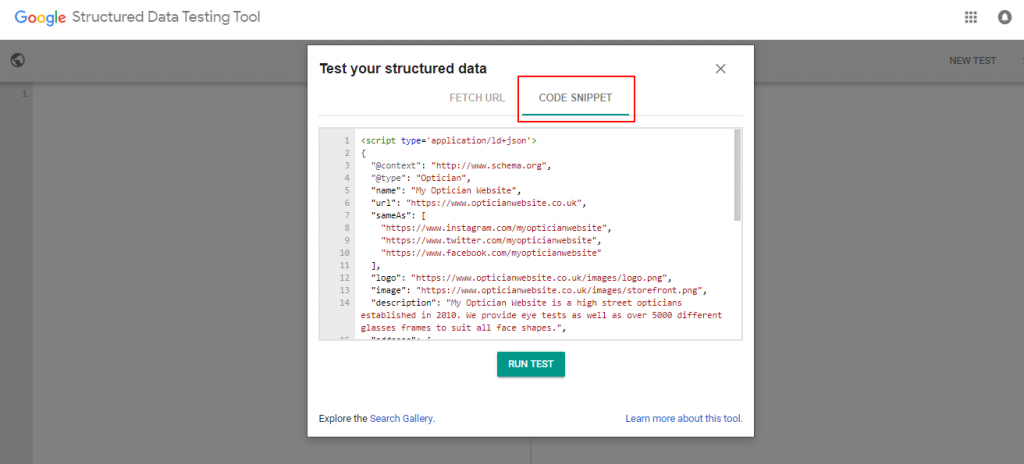
- Go to Structured Data Testing Tool
Once you have filled in all the details, copy the schema code on the right-hand side. Before you close the window, open a new tab up and go to the Google Structured Data Testing Tool, we need to make sure there are no errors before we continue. Once you go to the testing tool, click on ‘code snippet’ and paste in your schema like so:
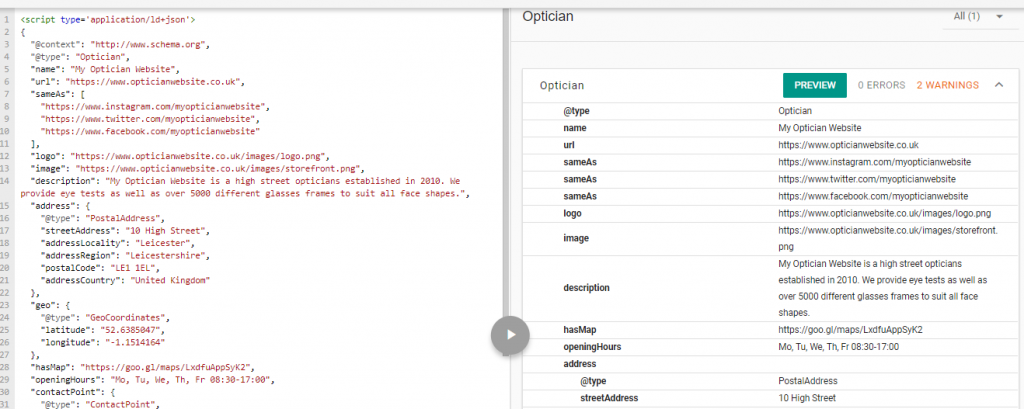
- Check for Errors
Now click run test and check for warnings or errors. There will usually be two warnings that pop up, for price range and telephone. We already have a telephone field so we can ignore these for now. You want to make sure there are no errors, if there are, Google will tell you which part is broken, if it says invalid URL then ensure you are using HTTP:// or HTTPS:// at the beginning and not starting the URL with WWW. You should see something like this:
- Check Details are Correct
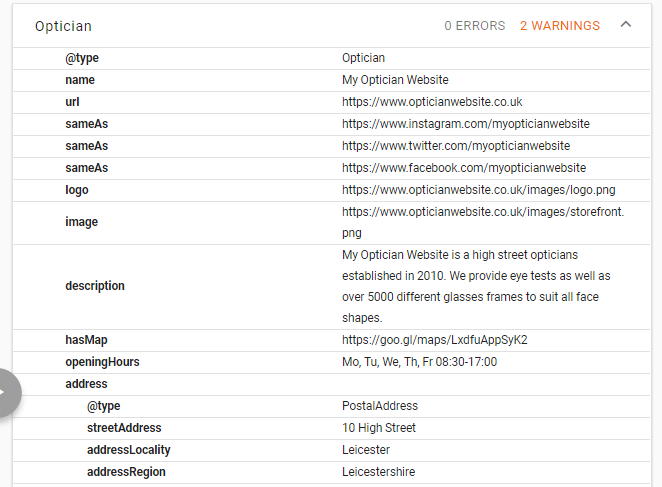
You should go through and ensure the details are correct and you’ve not made any typos. If it validates with no errors you are good to move on.
- Open up Google Tag Manager
Now we’ve created the schema and checked it validates we can move on to Tag Manager, so head over to your Google Tag Manager account and find the correct container.
- Create New Tag
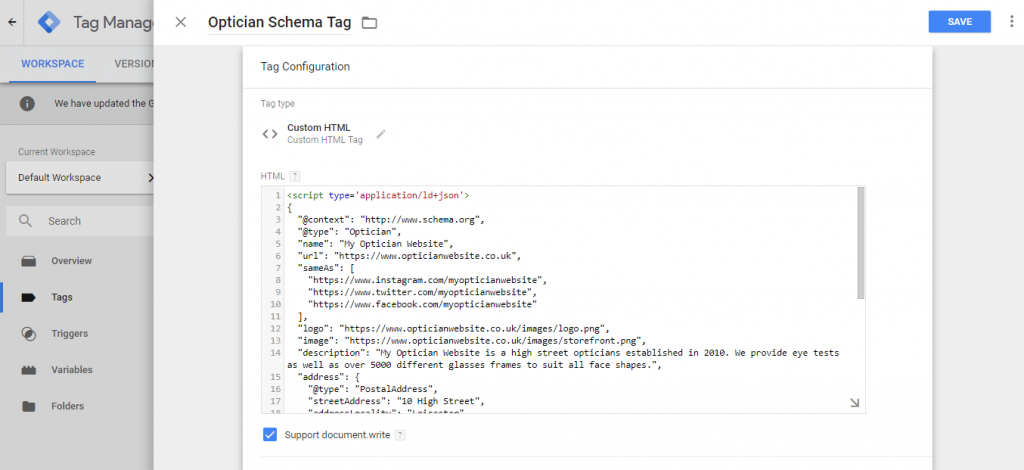
Once logged in we want to create a new tag, so click ‘tags’ on the right-hand side and then click new. At the top, you want to name the tag, so for example ‘Optician Schema Tag’.
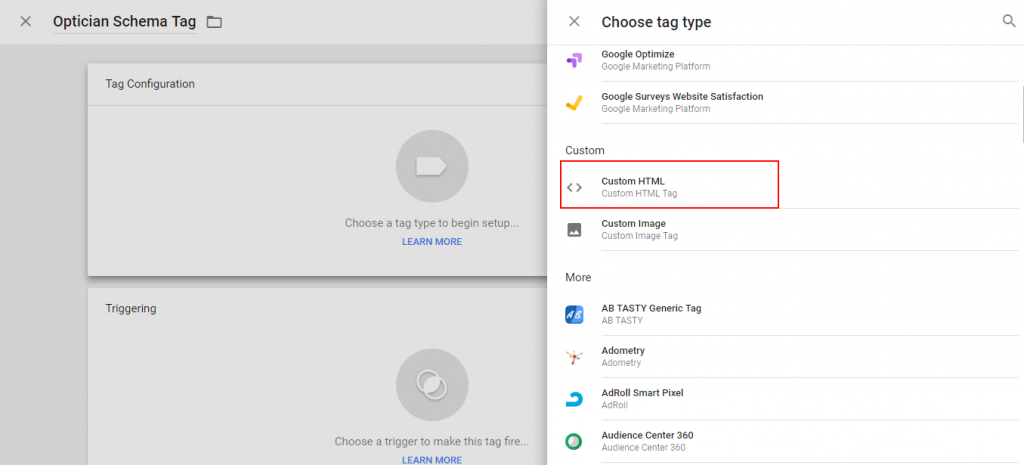
- Select Custom HTML
Next, click tag configuration and scroll down to ‘Custom HTML’.
- Paste in Schema
Once selected, you can paste in your schema code and tick ‘support document.write’ like below:
- Amend Schema Tag
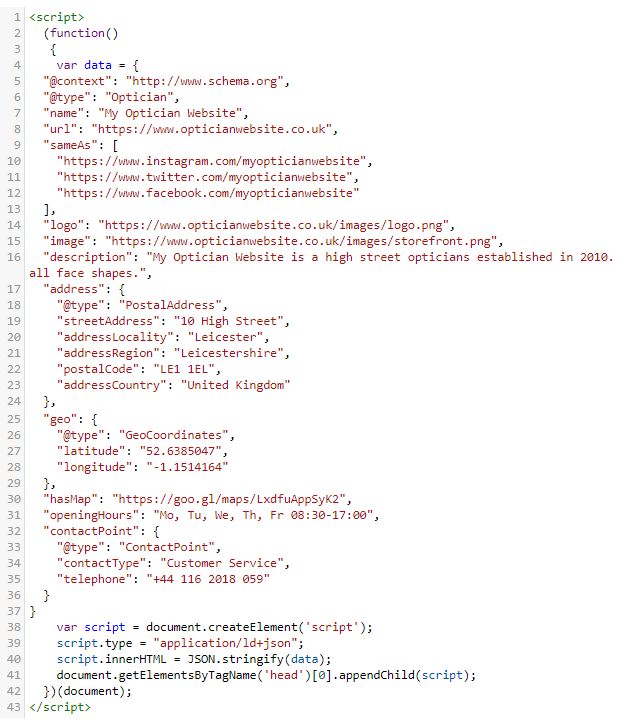
Now, remember at the start of the guide I mentioned about other guides missing one vital point? This is it. If we were to set the trigger and publish the schema it would fire but it would not be picked up by Google. So to ensure it works we need to change the code at the start and end of the schema code. We need to replace the opening script tag and opening { with the following:
<script>
(function()
{
var data = {
We then want to change the end of the schema, delete everything from the last } and replace with:
}
var script = document.createElement(‘script’);
script.type = “application/ld+json”;
script.innerHTML = JSON.stringify(data);
document.getElementsByTagName(‘head’)[0].appendChild(script);
})(document);
</script>
- Check New Schema Code
Your schema should now look like this:
- Select New Trigger
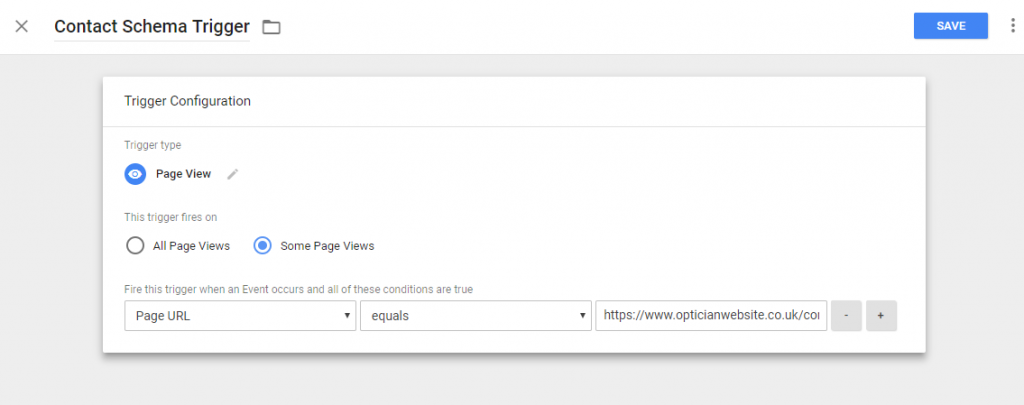
Once you’ve done that we need to add a trigger. For this we are going to set a trigger to fire when someone visits the contact page of the website. Click the trigger box below and select the blue cross on the top right of the page.
- Configure Trigger
Name the trigger, for example ‘Schema Contact Trigger’ and then click the box to choose trigger type. You want to select ‘Page View’ and then under ‘This Trigger Fires on’ select ‘Some Page Views’. Then from the drop-down menus select ‘Page URL’ > ‘Equals’ > Paste in your contact page:
- Save the Trigger
Save the trigger and then the whole tag. Now that we have created the tag and trigger we want to ensure it fires. To do this click ‘Preview’ on the top right of the page, you should see a page like this:
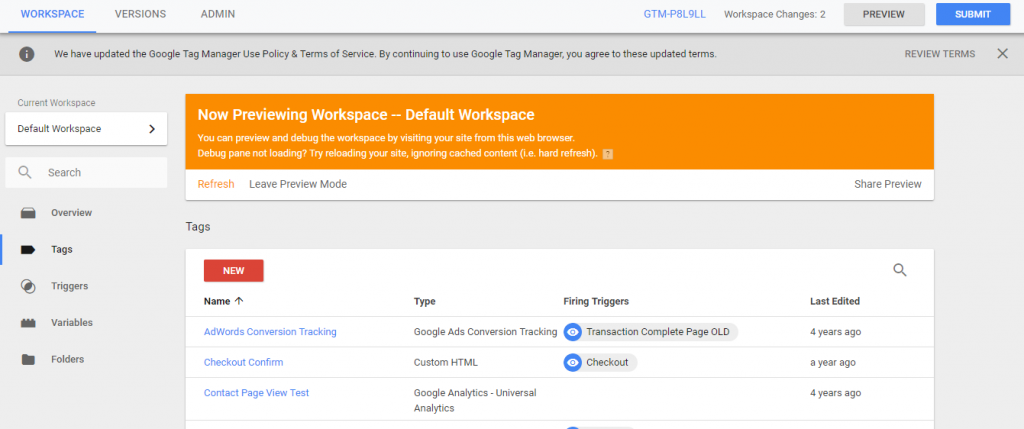
- Visit Website Contact Page
Now you need to go to your websites contact page and check that the tag is firing. You should see a window at the bottom of your screen when on the contact page, this is because you are in preview mode.
- Check Tag has Fired
Check the tags which have fired on the page to see whether your schema tag has fired. You should see it in the list like below:

- Exit Preview Mode
If you see that the tag has fired then this means the trigger has worked correctly. Now that we’ve confirmed this we can leave preview mode and publish the new tags. Just head back to Tag Manager, click leave preview mode and then submit the changes.
- Go back to Structured Data Testing Tool
Head back to the Structured Data Testing Tool and instead of testing a code snippet, you want to test the live URL so input your contact page and click ‘run test’. You should then see your schema appear like so:
- Test Live Page
If you see the schema within the panel then we know this has pulled through and is working. If it doesn’t appear, then ensure you’ve cleared the cache for that page and then try to run the test again.
Conclusion
Hopefully, you have found this guide useful. If so it would be great to hear your feedback and see if it worked for you. We will be testing this code on other types of schema in the coming months to ensure it works on all schema types.
Anicca Digital’s technical team are on hand to help out with a wide range of issues you might be experiencing with your website, so do not hesitate to get in touch if you need help setting up tag manager or implementing new tracking tags using Tag Manager.