Creating a Google Shopping Feed from Scratch using Google Sheets
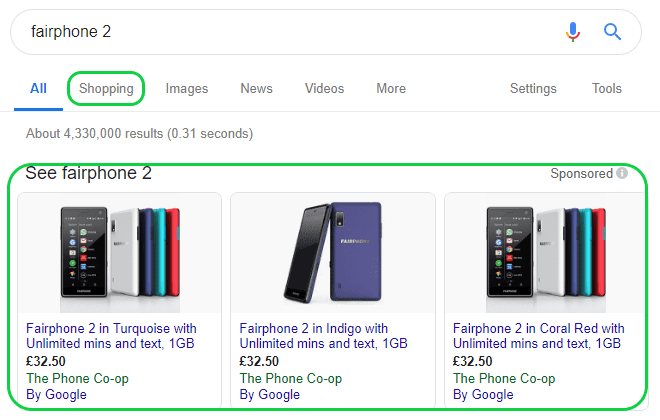
Shopping ads, or PLA (Product Listing Ads) as they are often referred to, are the visual product adverts that Google show for product related searches often at the top of search engine results and within the shopping tab of Google. Within the UK, shopping ads currently drive 82% of retail search ad spend look set to continue to dominate search engine spend and clicks in 2019.
Setting up a new shopping campaign in Google Ads (previously known as AdWords) can be quite daunting if you haven’t done it before. Google’s helpful ‘Beginners Guide’ page provides you with the feed specification of what’s required for the column headers which may or may not be required. It also explains the different file formats you may or may not want to use too.
We have created this simple guide for creating a basic feed using Google Sheets (G Sheets), which is available to everyone with a Gmail account. I’d advise that if you have a website with hundreds or thousands of products you should invest in finding a piece of scraping software or plugin for your website to provide the required details.
This guide will provide you with examples of what information to include within your product feed.
What you’ll need:
- A Gmail account
- A Google Ads account
- A Merchant Centre account
- A website and products
Step 1. Sign up to Merchant Centre Account
If you have not yet done so you will need to setup a Google Merchant Centre account which you can do so here using your existing Google ads details https://www.google.com/retail/solutions/merchant-center/
Step 2. Ensure Merchant Center is Linked to Google Ads
In Merchant Center, click the 3 dots in the top right-hand corner of the screen on the grey bar, then ‘Account linking’ from the drop-down menu.

On this screen, if you’ve used the same Gmail account to create your Google Ads and Merchant Center account, it should have your Google Ads customer ID already there ready to link. So, you just click ‘Link’.

If it’s not that simple, things usually never are, then you’ll have to copy your Google Ads Customer ID, located here in Google Ads. Either in the top left next to whatever you called your account, or by clicking on the little question mark in the top-right hand corner of the grey bar.

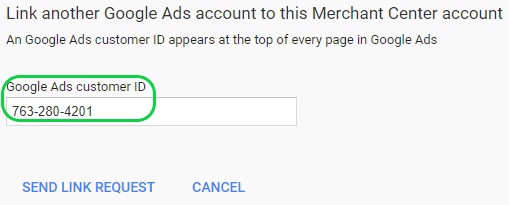
Head back to Merchant Center with your copied ‘Customer ID’ and click the ‘LINK ACCOUNT’ option.

Put your ID in, and click the ‘SEND LINK REQUEST’
You’ll now have to approve in Google Ads, head there and click ‘Tools’ in the top right-hand section of the screen in the grey bar.
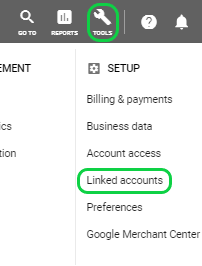
Then click Merchant Center in the Account Linking options listed and ‘DETAILS‘
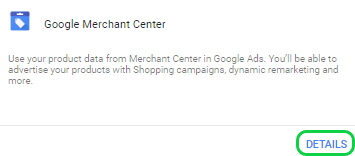
Then ‘VIEW DETAILS’

And ‘APPROVE’
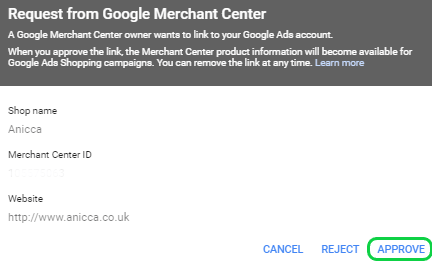
This account link will allow you to create a shopping campaign in Google Ads from a Merchant Center feed, as it pulls the primary feed directly from the linked Merchant Center account.
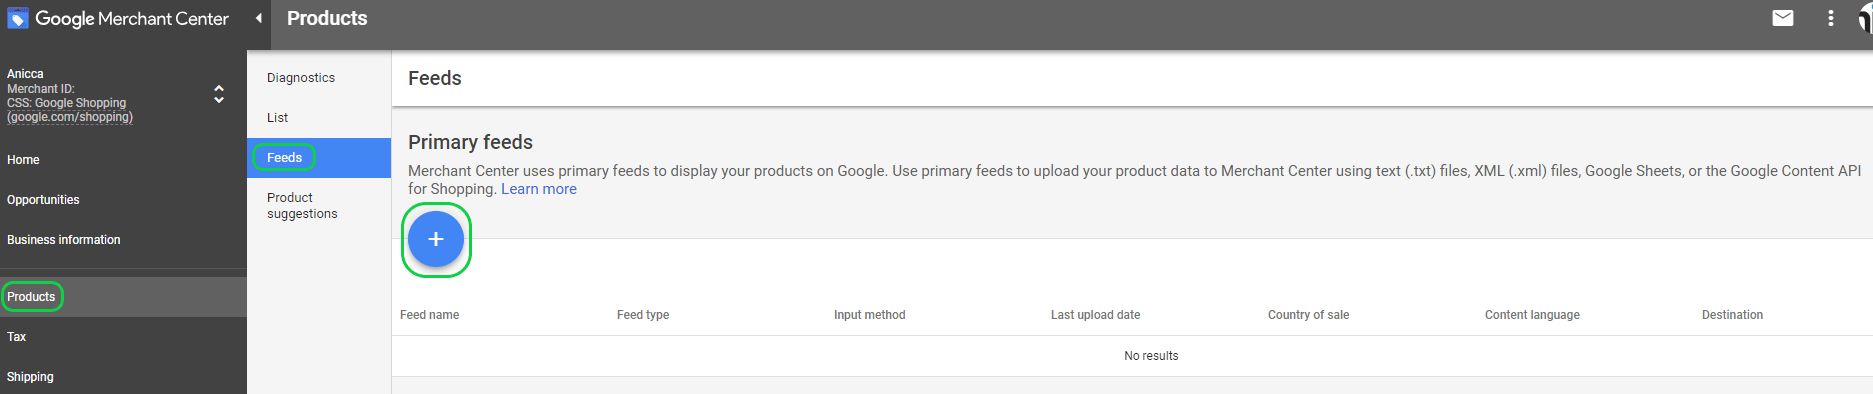
Step 3. Create the feed
In Merchant Center, click on the ‘Products’ option in the menu on the left, then ‘Feeds’ in the sub menu, and then the ‘+’
The next screen you shouldn’t have to make any changes on, so just a ‘CONTINUE’ from there.

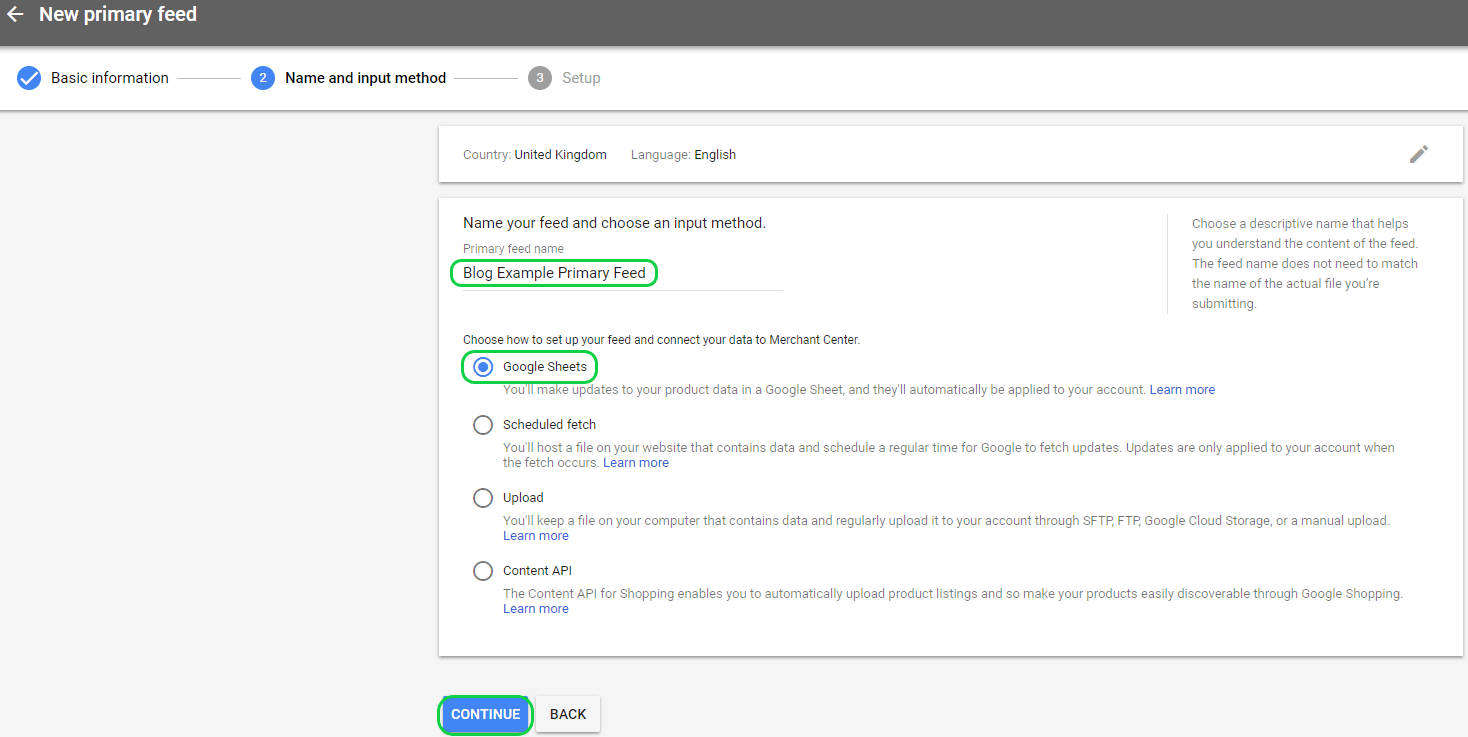
The next step is naming your feed, which can be anything you like. Keep the feed type set to ‘Google Sheets’, and then click ‘CONTINUE’
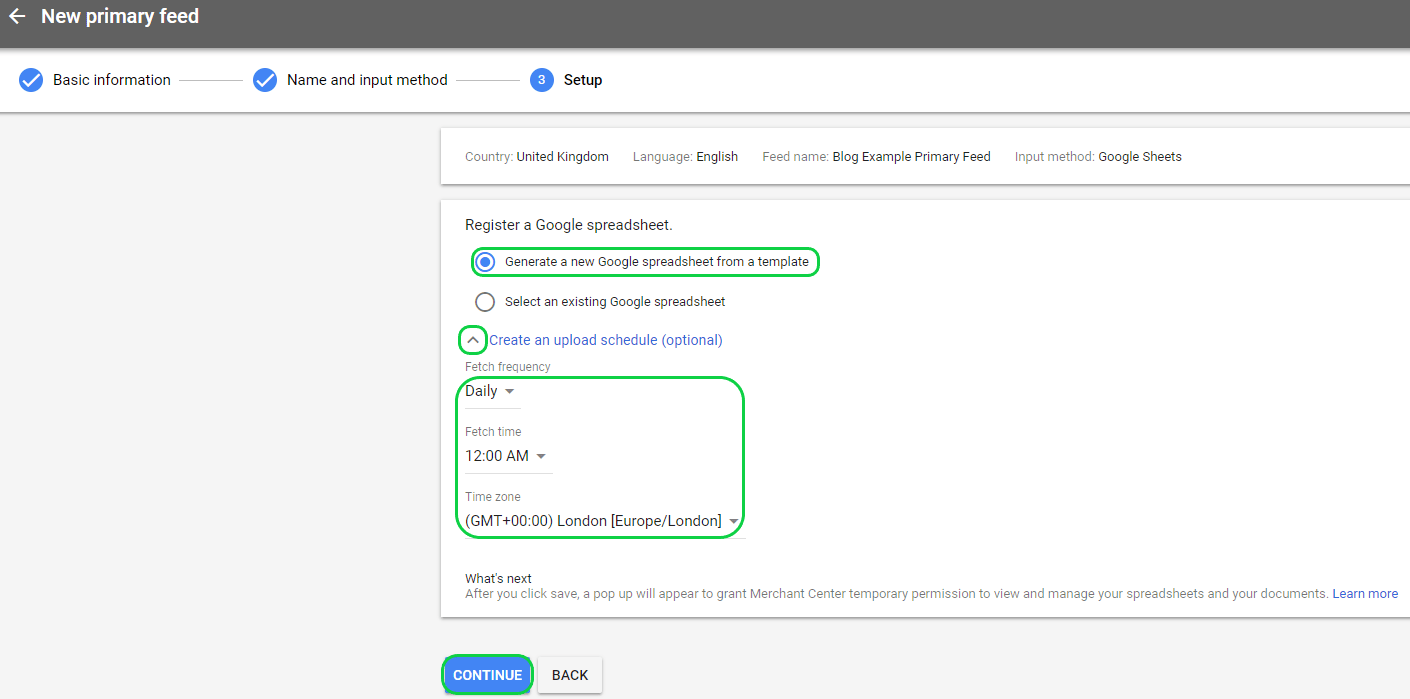
The third step is either creating a feed from a template, which is handy considering the source, or uploading one you’ve created earlier in G-sheets. For convenience we’ll use the ‘Generate a new Google spreadsheet from a template’ option. Click the little drop down arrow to tell Google when andd how often to fetch your feed. I would suggest a daily fetch around a time that you’d have finished making any changes. Note: if your feed hasn’t been updated in 30 days Google starts an ‘Out of date’ countdown which could get your products disapproved, so always ensure you have a regular upload schedule. Once you’ve finished with those settings click ’CONTINUE’ .
You should now have a template feed uploaded to Merchant Center, albeit without any products in. Open it in G-sheets to start populating your product data.

For the purpose of the blog I’m going to pretend that the people at Anicca are our products, and I’m going to be the first product.
I’ve added a few more columns (In blue; ‘identifier_exists’, ‘custom label 0’ and ‘promotion id’) that you might want to add into your feed as well, you might need these for your structure or promotions later. Here is a downloadable version of the document below, which can be copied and pasted directly into your created template/feed.


You can use the data I’ve provided as an example to create your own product data. However do not try and upload the contained data as this is just dummy data and these products will be disapproved by Google as there is no way to purchase on the link provided.
Once you’ve inputted all your data you can either manually force an update for your feed or wait until you’ve scheduled your fetch.
To force it to do it now click on ‘Products’ then ‘Feeds’ then click on your feed name ‘Blog Example Primary Feed’ in Merchant Center
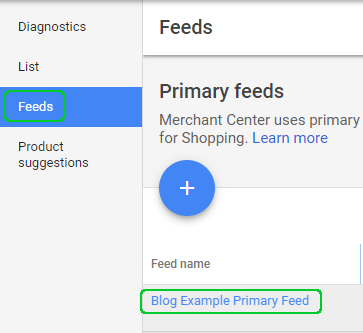
Then ‘FETCH NOW’ on the right

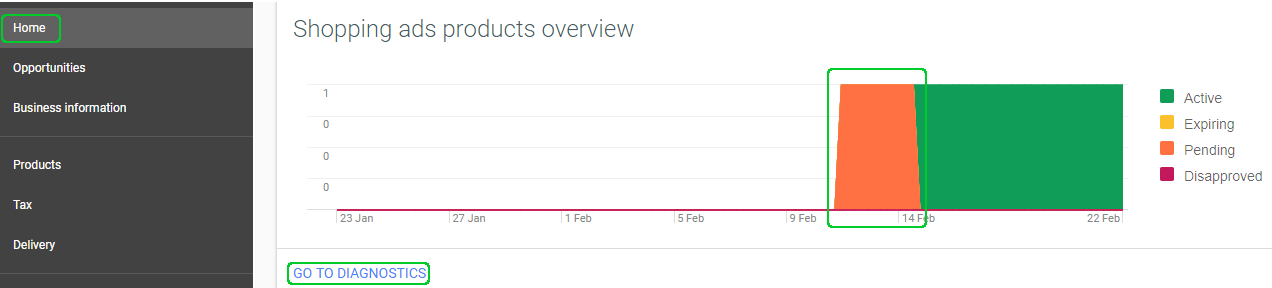
It can take a while for your products to show up in Merchant Center, but you should be able to see the overall status on the ‘Home’ tab. Your products/feed will be analysed by Google and in this case took from the 11th to the 14th to approve a single product. If it’s been a while and your products are still ‘Pending’ or ‘Disapproved’ you can click ‘GO TO DIAGNOSTICS’ to see what issues Google has with your products.
Step 4. Setup Your Shopping Campaign in Google Ads
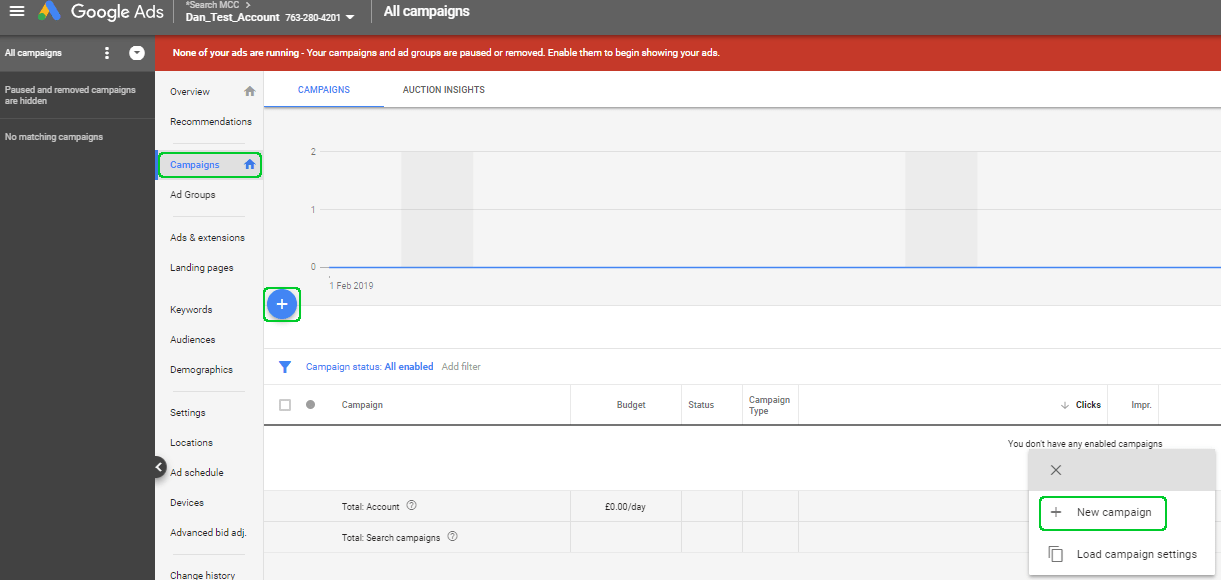
Click onto the campaigns tab if you don’t have it already set to your home with the little blue house icon (if that works – not much does in the new interface), and then click the blue circle with the plus in the middle, followed by ‘+ New Campaign’
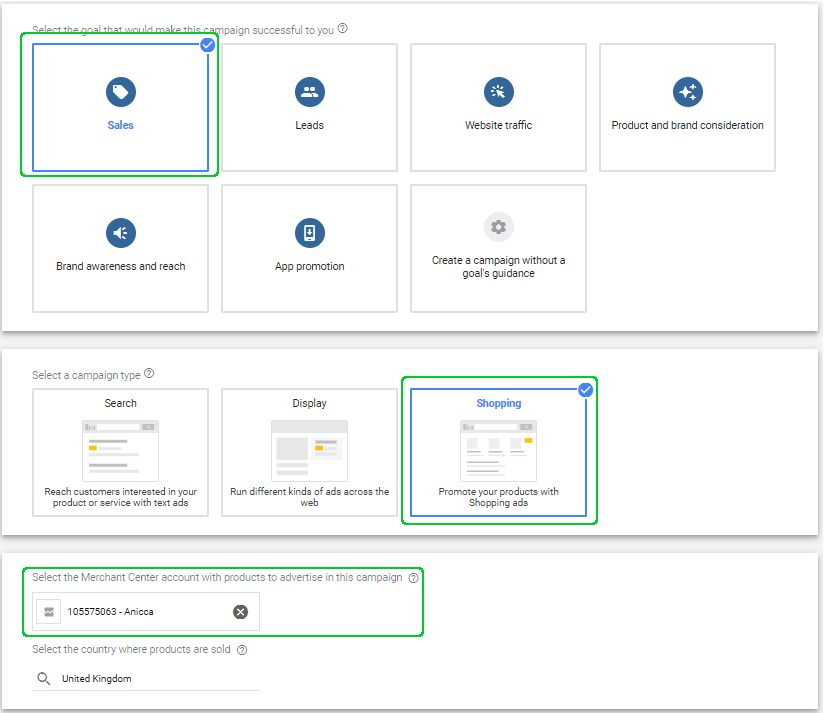
On the next screen you’ll be asked what goal and type of campaign you’d like to create. Usually with shopping campaigns the goal is to sell a product ‘Sales’, and then the campaign type will be ‘Shopping’, as we linked Merchant Center and Google Ads earlier your account should automatically be added to the ‘Select the Merchant Center account with products to advertise in the campaign’
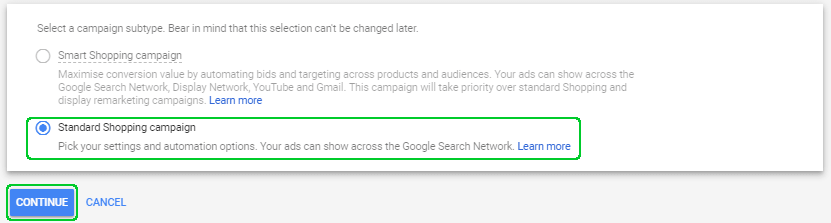
You’ll be asked what campaign subtype you’d like to use as well, but unless you’ve had 20 conversions in the last 45 days ‘Smart Shopping’ will be greyed out, so leave that radial selection on ‘Standard Shopping campaign’ and click ‘CONTINUE’
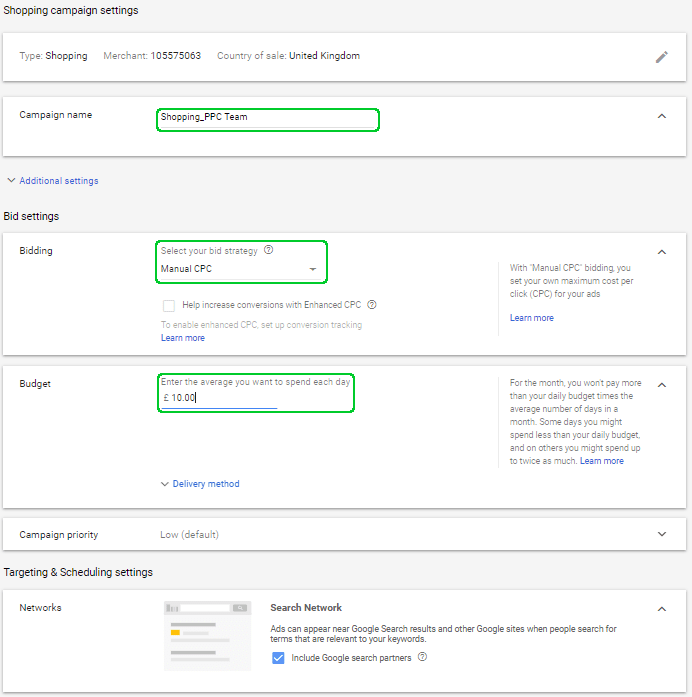
The next step you’ll be naming your new campaign, I like all of my campaign types to sit together in editor so they all begin with the type of campaign they are, in this case it’s a shopping campaign, which I will split down to only contain our PPC Team (we added the custom label for this – your structure may differ to mine and contain all products then split them with ad groups)
For now, leave the bidding strategy on ‘Manual CPC’ and set your daily budget (£10 a day for example)
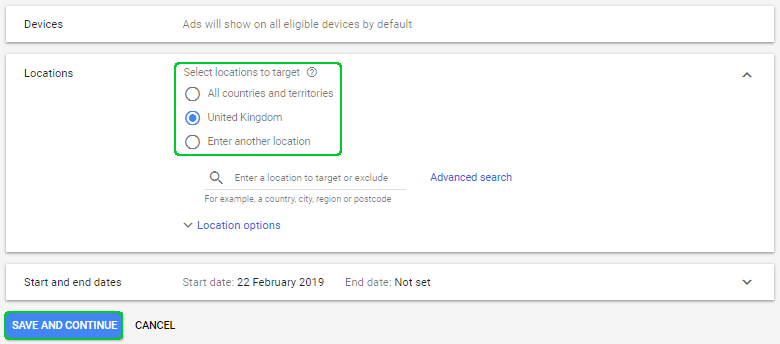
The rest of the settings you only need to change if you’re doing a more localised campaign rather than targeting the entire UK, so you can go ahead and click ‘SAVE AND CONTINUE’ (all of these settings can be reviewed and changed at a later date – if you’d like to remove the Isles and Ireland etc. for mainland UK)
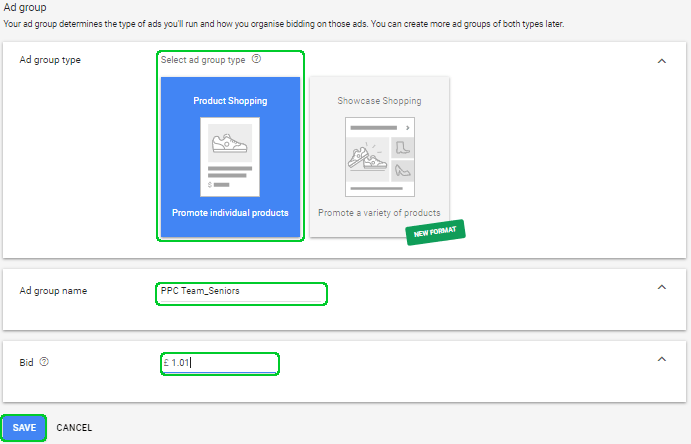
The next stage is Ad groups, as my structure is separating the Anicca team types at campaign level, the first Ad group will be for the Seniors of the PPC Team. So, the Ad group is called ‘PPC Team_Seniors’ and the Bid I’ve set to £1.01. You’ll have a better understanding of average CPC’s when your campaign goes live. Hit ‘SAVE’ and we’ll be able to sort the product tree/structure.
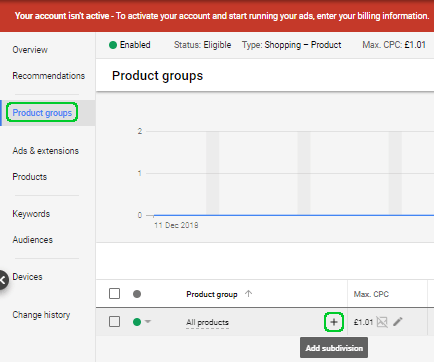
Your ad groups product group will start with ‘All products’ as we didn’t filter the feed coming in, so your job now is to segment all of your products into sub divided ad groups (Usually the same kind of structure you use on your website). To start, click the ‘+ plus symbol’ right of ‘All products’
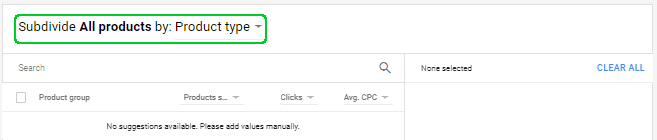
The next screen you can select all the different columns you could use to divide your products
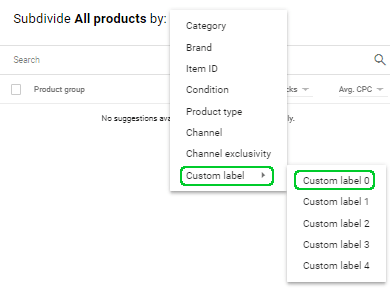
As we added a ‘Custom Label 0’ to divide the teams to PPC, SEO, CAD etc. the first sub divide will be by ‘Custom Label 0’
Add ‘PPC Team’ from the product group selection (this contains all the products within the ‘PPC Team’)
From there you can sub divide down again into ‘Item ID’ (it’s highly recommended that all products should be divided down to MPN level) by clicking the ‘+’ at the right hand side of ‘PPC Team’ or whatever your first sub divide is called.
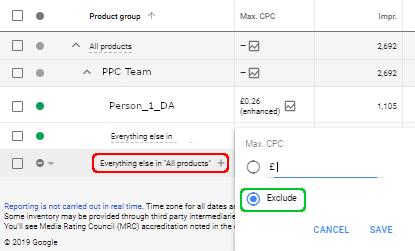
Your product group tree should look a little like the one above, don’t forget to exclude products in ‘Everything else’ as you should be creating other ad groups for those to be in. That last screenshot was a photoshop job as Google didn’t like my pretend blog feed (understandable that they don’t want me selling people I suppose)
I hope this has helped in some way. Good luck selling all your products online and using Google Ads to boost your sales and revenue. If you require support with setting up your feed and selling your products online then Anicca can help. Get in contact with us today to find our more.