How To Improve your AdWords Conversion Rates by using a Location Target Ad Customiser
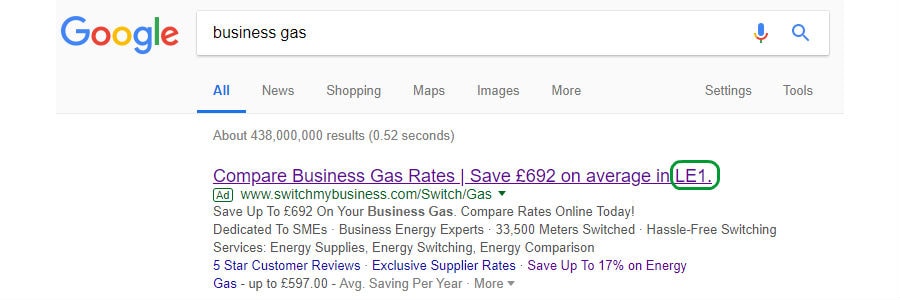
In an AdWords ad, have you ever noticed the postcode at the end of the headline? This method dramatically increases conversions, do you want to learn how to do this? Here’s an easy five-step guide on how to show your target audience’s postcode or city within the ad targeted to them, this technique ensures that your audience knows that you offer your product or service in their area.
Using these ads will enable you to create one ad which can target the whole of the mainland UK but adds the specific city or postcode into the ad based on the geographical location of the user searching.
Step 1 – Decide Who You’d Like to Target
An ad can only reference one business data document, so you’ll have to incorporate everything you want to reference in the ad in that single document. I usually add multiple columns for test headlines and descriptions as well as individual metrics to reference separately (there will be examples later).
For convenience, let’s say that you’re a landscape gardener (weed’em and reap ltd) who covers the East Midlands. You can now target by city and/or postcode within the East Midlands to deliver an ad specifically designed for the searcher’s location. If the ad shows a local postcode, users are more likely to click, thus improving CTR (click-through-rates) which improves your quality score and ad relevance. This will ultimately lower your CPCs (cost per click) and gain more conversions.

Step 2 – Downloading the Template for Business Data
You’ll need a specific set of columns and a specific set for AdWords, so it’s best to grab a template. I’ve provided the link to the help page where the Google one can be downloaded. The document provided by Google has examples of other targeting methods you can use instead of location. Please note: The document needs to be uploaded as a CSV file.
AdWords Business Data import template can be downloaded here;
My import is available in the next step.
Step 3 – Getting Your Information Together
Gather up all the postcodes or cities you want to target and add them to the target location column (These can be found in your Geographic or User Location reports).
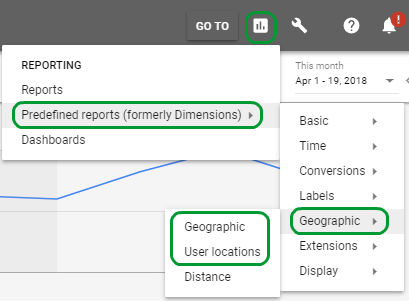
This column can use anything you’d usually target in Google’s radius targeting (region, postcodes, town/cities, etc.).
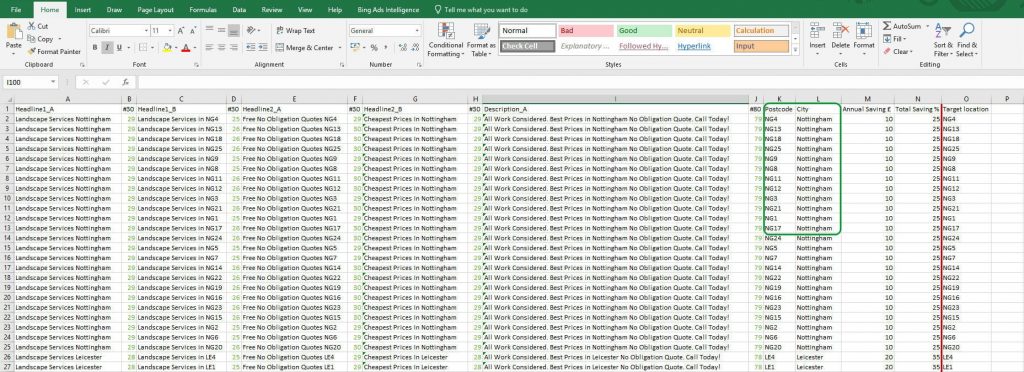
The above document is available to download here; Excel Worksheet, CSV.
Everything left of the red line are columns for you to reference (you can use as many or as few as you like), be careful if you’re using full headlines to conform to the AdWords expanded text ads character limits. Right of the red line is for Google’s reference (just the postcodes used for targeting in this case).
In the green box is the individually referenced values for our use, not AdWords, just in case we need them without any fluff.
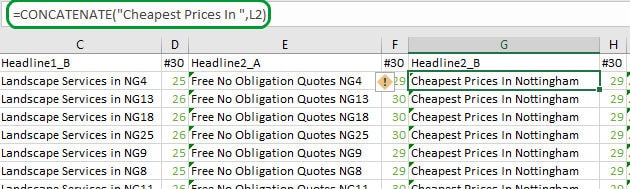
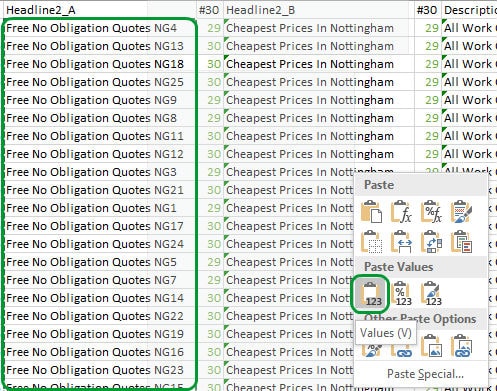
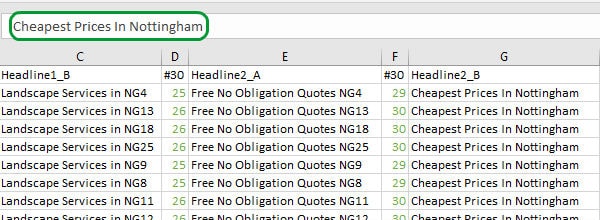
Excels ‘=CONCATENATE(“Landscape Services “,L2)’ function will be your best friend while creating the spreadsheet for your business data. This allows you to add a custom message before referencing the city/postcode with the cell location “L2” – the above returns this in excel “Landscape Services Nottingham”. Please note: you’ll have to copy the entire column and paste values to make sure the excel formulae is removed before uploading the document.
Before
Pasting Values
After
Step 4 – Uploading Your CSV Spreadsheet to Business Data
If you used my document as a template instead of the AdWords one, you may want to delete the character counting columns (the ones in green) and save separately as a CSV file.

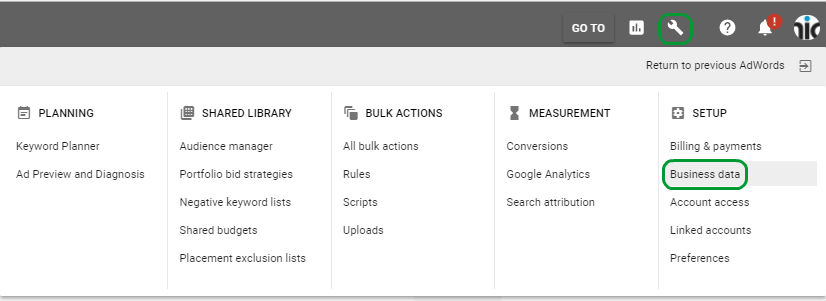
Business data can be found by clicking the spanner in the top right-hand corner of the new AdWords interface and under the setup section, and then clicking business data.
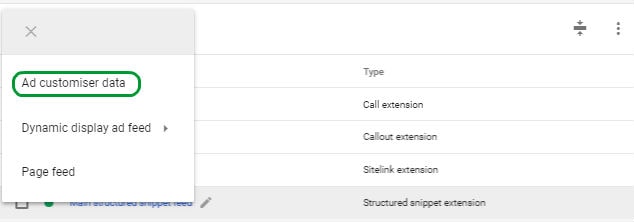
Once you’re in the business data section, you should be able to see a blue circle with a plus sign in the middle, click this and select ‘Ad customiser data’.
![]()
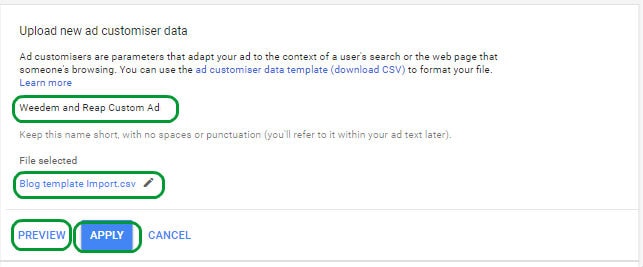
Give your spreadsheet a name (you’ll be finding this later when we create the ad), click ‘Choose file’ to navigate to your ad customised spreadsheet, once you’ve found your document hit ‘Apply’ (it may take a few seconds to appear in the list).
If you’re worried you did something wrong, hit ‘Preview’ instead and see if the data uploaded looks how you’d like it to. If it does, hit ‘Apply’, if not, back to the drawing board, but you’re on your own because mine looks fine.
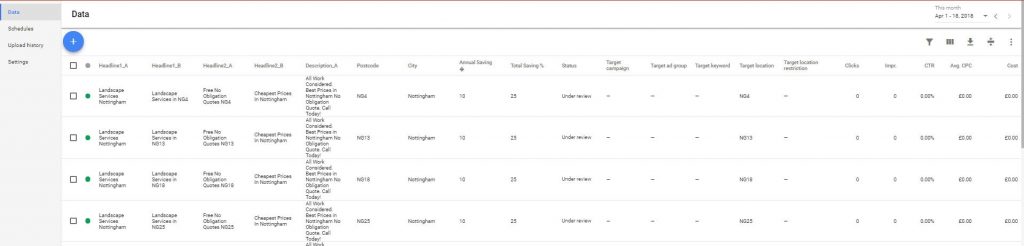
That’s it! You can now reference any of those columns in an ad. It might be worth checking all the information has been loaded correctly into the document by clicking on the name in the list of documents available and previewing it (even if you’ve previewed it before).
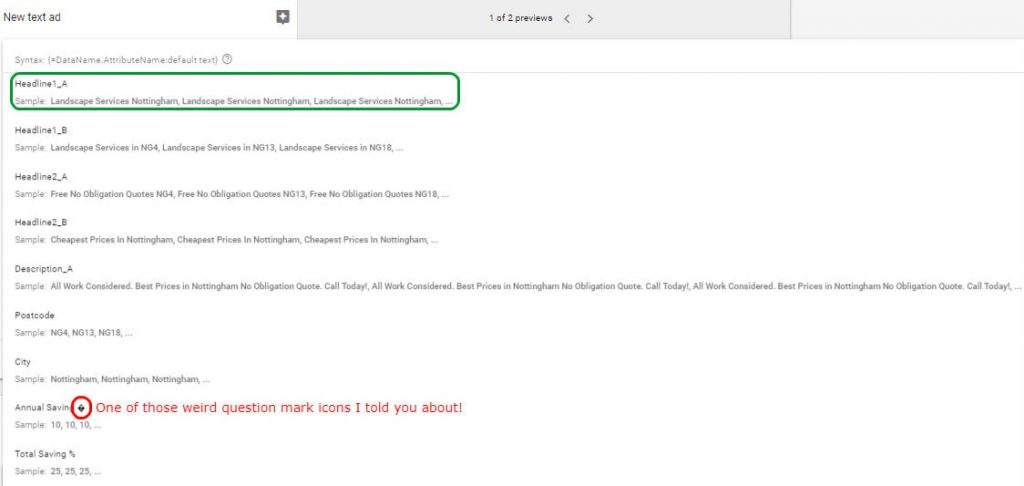
Sometimes adding £ or % characters in a sentence will show as a weird question mark icon, but don’t worry, if that happens, you can do a find and replace of all the date by selecting all, clicking ‘edit’, ‘change items…’
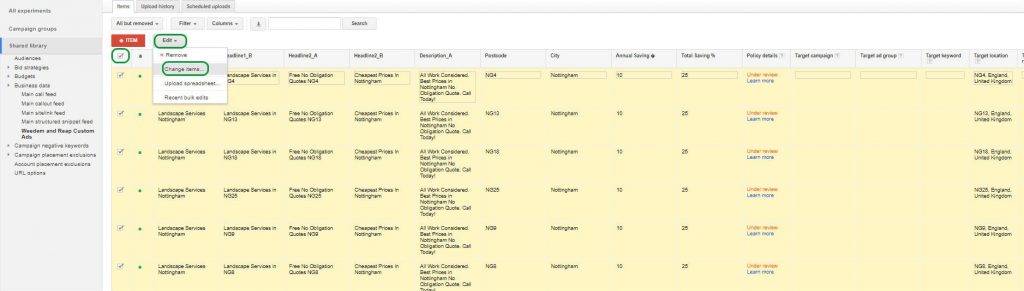
As far as I’m aware, this function is only available in the old interface of AdWords, so you’ll have to switch back and then find the business data section again. This is now in the left-hand column under ‘Shared Library’.
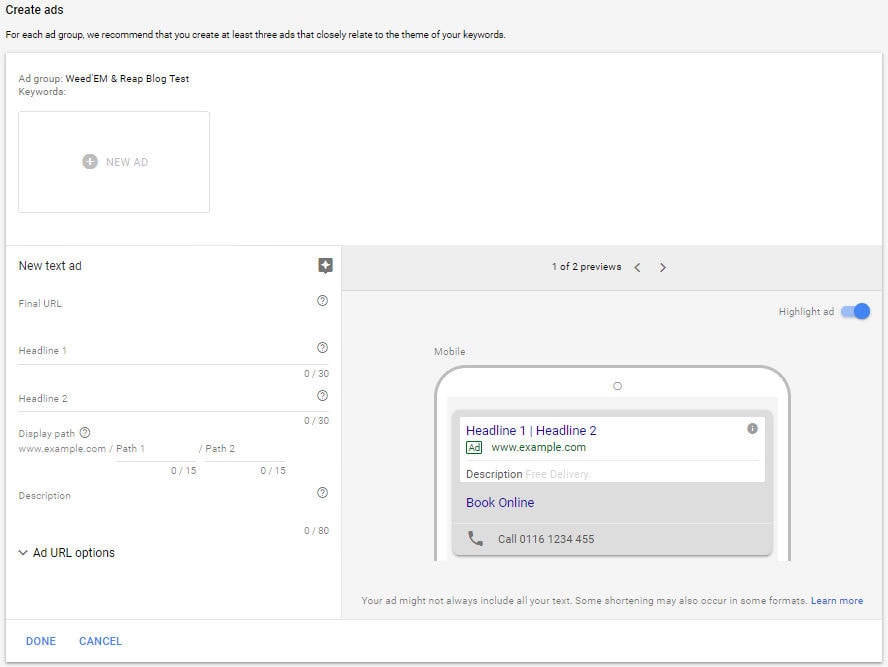
Step 5 – Creating the Ad
Now your data is ready to use, you can put it to work. Either create a new campaign and adgroup or use an existing campaign and navigate down within the adgroups to where you’d like to create your text ad.
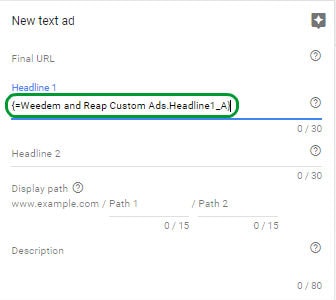
To start creating your customised ad, use the squiggly bracket and equals ‘{=’, this should allow you to find the document name you saved in Business data back in step 4 (Weedem and Reap Custom Ads).
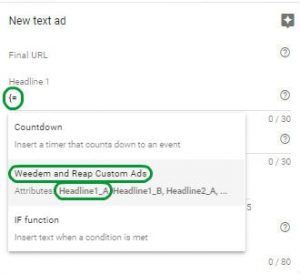
Then select one of the columns you wanted to use for headline 1, 2 or the description (whichever you’re populating first). In my case, I’m populating headline 1 so I’ve selected my ‘Headline1_A’ column.
The “code” in headline 1 should look something like this now
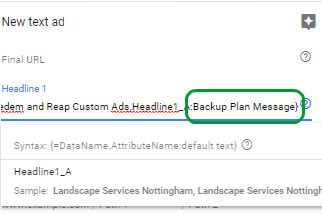
But you’re not finished yet, what if Google has no clue where you are? You need a default message to revert to, your contingency plan. Just after the last character of the column name and before the ending squiggly bracket ‘}’ put a full colon in ‘:’ and type your backup plan (within character limits of whatever field you’re in).
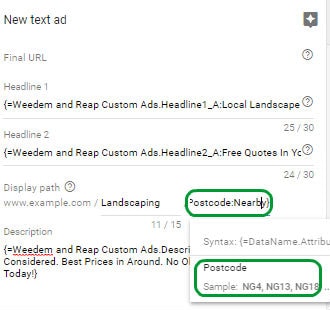
You can do this just for headline 1 and have written text for headline 2 and description like a normal ad, or show off and add some more tailored details in. AND if you’ve added some of the data in columns separately like I told you to, you could even add the customer postcode or city into the text ad paths.
Your ad preview should show you a few examples of how your final ad will look
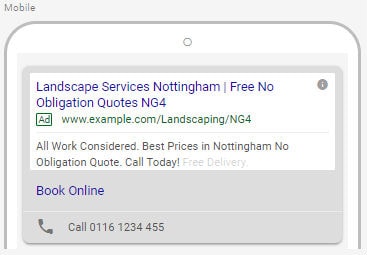

It’s probably best practice to only mention the city or postcode once and use the limited real estate space for unique selling points, this ad is a little distasteful/overkill, but you get the idea.
Too complicated? We’re here to help, contact us for further advice.