Tracking all outbound Links using Auto Event Tracking in Google Tag Manager
This is a straight forward guide for people wanting to easily track and record outbound link clicks from their website. This could include links to social media sites, external forms, PDF documents or other websites.
There are essentially two ways to do this:
- Manually adding tags to each link you want to track using event tracking e.g. (_trackEvent). I won’t go into detail about this here but you read about it from Google here
- Using Google Tag Manager (GTM) with Auto event tracking (new)
Step One: Install Google Tag Manager on Your Site
You will need Google tag manager to utilise auto event tracking and you will need to have Google Analytics installed on your site.
Create a tag manager account and place tag manager on all pages of your site. You can read up more about GTM here http://www.google.co.uk/tagmanager.
Note: you don’t have to run your Google Analytics code through it if you don’t want to!
Step Two: Create a New Tag – Link Click Listener
In order for Google Tag manager to ‘auto’ detect when a link is clicked on, you first need to ensure you have a mechanism for doing so. This is where the tag ‘Link Click Listener’ comes into play.
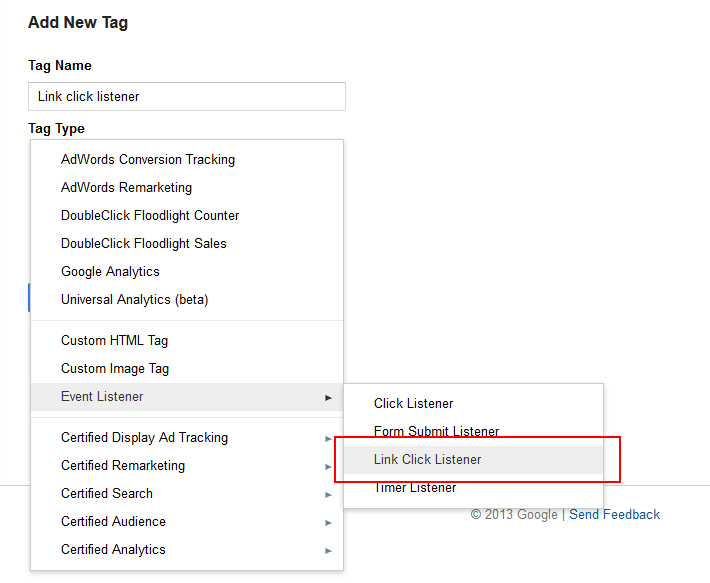
When this tag is fired, Google Tag Manager begins listening for link clicks on the page. When a link is clicked, the Google Tag Manager event gtm.linkClick is generated.
Select the firing rule ‘All Pages’ so that it is available to be used on any page of the site.
Step Three: Create a New Tag – Google Analytics Event
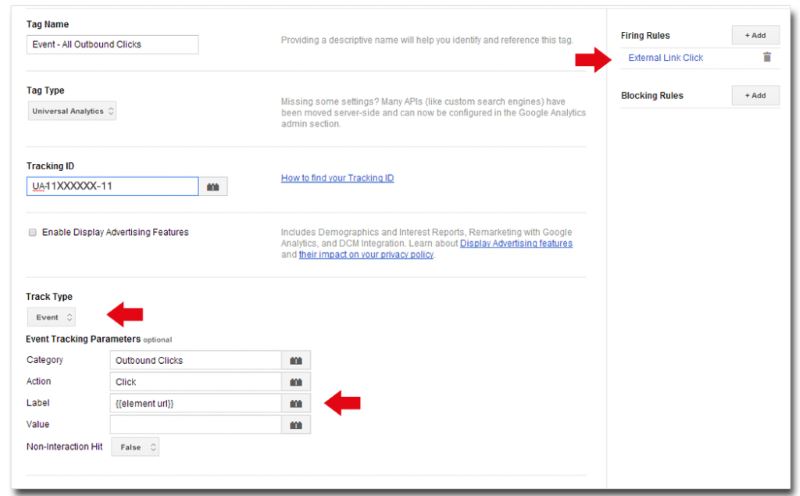
The second part involves creating an Analytics Event tag that will pass the info into your Google Analytics account. To do this, create a new Google Analytics tag and select the tracking type as ‘Event’. Enter your tracking ID i.e. your Google Analytics account property ID.
Give it an appropriate Category name e.g. ‘All Outbound Clicks’
For Action you can put ‘Click’ (it doesn’t really matter)
For Label select the macro {{element url}} by clicking on the little lego brick symbol next to it. This will dynamically bring in the URL clicked – very important!
Create a new Firing Rule {{event}} equals gtm.linkClick and {{element url}} does not contain ‘your website url’.
This is crucial for letting the Link Click Listener connect with your Google Analytics event.
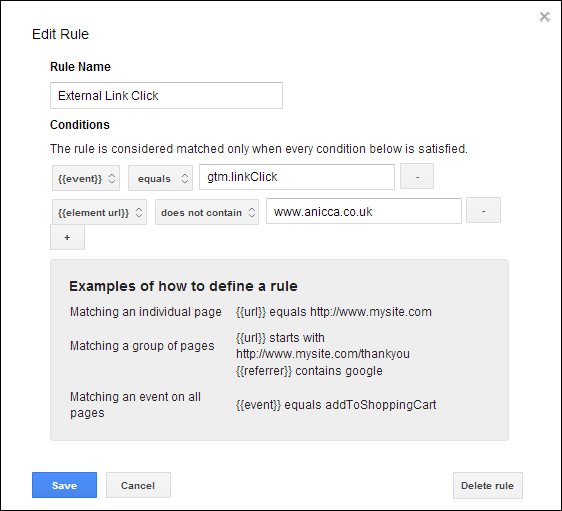
Note: By excluding your own URL this ensures that you collect data for external outbound links only and not internal links. Alternatively you could change this to include certain links only, rather than all links.
Step Four: Publish Your New Tags
Now you have created your new tags remember to save your tags and create a version and publish your new tag!
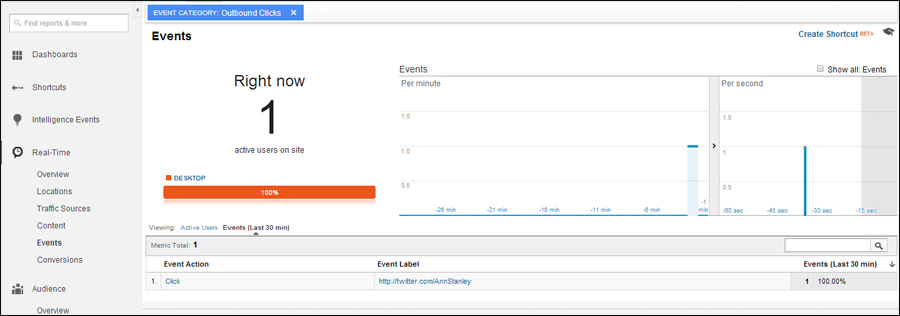
Step Five: Test Your Tags Are Working
A good way to test that your new event tracking is working is by clicking on some of your outbound links and then going into your real time events report in Analytics to view. If you have setup everything correctly you should see information coming into your account relatively quickly (within a few minutes).
Step Six: Locate Your Events in Google Analytics
Now that you have Google Analytics capturing all outbound link clicks from your site, you can locate these within the Events report within Google Analytics. Find this in the Behaviour section. Click on Event Label to see the full list of all your captured outbound link clicks.
Bonus Tip:
Now that you have your outbound link information coming into Analytics, you have the ability to create goals using the events that you have setup. For example if you wanted to report on outbound clicks to your Facebook page you could create an event goal based the Event Label containing ‘facebook.com/.’